Installation and Configuration
This section explains how to install and configure a new Horizon instance. It describes how to do the following tasks:
-
Install all required OpenNMS Horizon components, including PostgreSQL, on a single node.
-
Run Horizon core and PostgreSQL with the default configuration.
The default configuration is not optimized to run in a production environment or monitor large networks. -
By default, your time series database is JRobin, which persists RRD files on the local file system.
-
-
Sign in to the web UI and change the
adminaccount’s default password.
Requirements
The following components and settings are required to set up a new Horizon instance:
-
A Linux physical server, or a virtual machine running a supported Linux operating system.
-
Internet access to download the installation packages.
-
A working DNS server, and a localhost and server name that resolve properly.
-
A system user with administrative permissions (
sudo) to perform installation. -
A SELinux policy that permits binding to the ICMP service, if necessary.
If you do not include the appropriate SELinux policy, Horizon may generate an ICMP permissions error when starting up (see SELinux and ICMP permissions). -
To run services in Docker, you need Docker Compose for the service stacks from our examples. On Debian, you must install and configure
sudoyourself. See the Debian Wiki for more information.
| Time synchronization is a critical part of operating a monitoring system. Ensure you have a functional time synchronization process running with your operating system. If you are not familiar with this topic, the knowledgebase article Ensure time synchronization for your OpenNMS components is a good starting point. |
Set up PostgreSQL
PostgreSQL 14 and 15 use the scram-sha-256 password authentication method by default.
If you use older versions of PostgreSQL, you should change the method in postgresql.conf and in pg_hba.conf before installing the Horizon core instance.
|
sudo dnf install langpacks-en glibc-all-langpacks -y
sudo localectl set-locale LANG=en_US.UTF-8
sudo localectl
sudo dnf makecache
sudo dnf update -y
sudo reboot
sudo dnf info postgresql-server| These procedures use a specific PostgreSQL version. Make sure you reference your current PostgreSQL version. |
sudo dnf -y install https://download.postgresql.org/pub/repos/yum/reporpms/EL-9-x86_64/pgdg-redhat-repo-latest.noarch.rpm
sudo dnf -y install postgresql14-serversudo /usr/pgsql-14/bin/postgresql-14-setup initdbsudo systemctl enable --now postgresql-14sudo -i -u postgres createuser -P opennms
You must provide a secure password for the opennms database user account.
This guide uses YOUR-OPENNMS-PASSWORD as a placeholder.
|
sudo -i -u postgres createdb -O opennms opennmssudo -i -u postgres psql -c "ALTER USER postgres WITH PASSWORD 'YOUR-POSTGRES-PASSWORD';"
Change YOUR-POSTGRES-PASSWORD to a secure one.
The superuser is required to be able to initialize and change the database schema for installation and updates.
|
sudo vi /var/lib/pgsql/14/data/pg_hba.confhost all all 127.0.0.1/32 md5 (1)
host all all ::1/128 md5 (1)| 1 | Change method from ident to md5 for IPv4 and IPv6 on localhost. |
sudo systemctl reload postgresql-14sudo dnf -y install postgresql-server postgresqlsudo postgresql-setup --initdb --unit postgresqlsudo systemctl enable --now postgresqlsudo -i -u postgres createuser -P opennms
You must provide a password for the opennms database user.
This guide uses YOUR-OPENNMS-PASSWORD as a placeholder.
Please set a secure password.
|
sudo -i -u postgres createdb -O opennms opennmssudo -i -u postgres psql -c "ALTER USER postgres WITH PASSWORD 'YOUR-POSTGRES-PASSWORD';"
Change YOUR-POSTGRES-PASSWORD to a secure one.
The superuser is required to be able to initialize and change the database schema for installation and updates.
|
sudo vi /var/lib/pgsql/data/pg_hba.confhost all all 127.0.0.1/32 md5(1)
host all all ::1/128 md5(1)| 1 | Change method from ident to md5 for IPv4 and IPv6 on localhost. |
sudo systemctl reload postgresqlsudo yum -y install https://download.postgresql.org/pub/repos/yum/reporpms/EL-7-x86_64/pgdg-redhat-repo-latest.noarch.rpmsudo yum -y install postgresql12-server postgresql12sudo /usr/pgsql-12/bin/postgresql-12-setup initdbsudo systemctl enable --now postgresql-12sudo -i -u postgres createuser -P opennms
You must provide a password for the opennms database user.
This guide uses YOUR-OPENNMS-PASSWORD as a placeholder.
Please set a secure password.
|
sudo -i -u postgres createdb -O opennms opennmssudo -i -u postgres psql -c "ALTER USER postgres WITH PASSWORD 'YOUR-POSTGRES-PASSWORD';"
Change YOUR-POSTGRES-PASSWORD to a secure one.
The superuser is required to initialize and change the database schema for installation and updates.
|
sudo vi /var/lib/pgsql/12/data/pg_hba.confhost all all 127.0.0.1/32 md5(1)
host all all ::1/128 md5(1)| 1 | Change method from ident to md5 for IPv4 and IPv6 on localhost. |
sudo systemctl reload postgresql-12sudo apt -y install postgresqlsudo -u postgres createuser -P opennms
You must provide a password for the opennms database user.
This guide uses YOUR-OPENNMS-PASSWORD as a placeholder.
Please set a secure password.
|
sudo -u postgres createdb -O opennms opennmssudo -u postgres psql -c "ALTER USER postgres WITH PASSWORD 'YOUR-POSTGRES-PASSWORD';"
Change YOUR-POSTGRES-PASSWORD to a secure one.
The superuser is required to initialize and change the database schema for installation and updates.
|
docker-compose.yml filemkdir postgres
cd postgres
vi docker-compose.yml---
version: '3'
volumes:
data-postgres: {}(1)
services:
database:(2)
image: postgres:15(3)
container_name: database
environment:(4)
TZ: 'America/New_York'
POSTGRES_USER: 'postgres'
POSTGRES_PASSWORD: 'my-postgres-password'
volumes:(5)
- 'data-postgres:/var/lib/postgresql/data'
healthcheck:(6)
test: [ "CMD-SHELL", "pg_isready -U postgres" ]
interval: 10s
timeout: 3s
retries: 3
ports:
- '5432:5432/tcp'| 1 | Persist the PostgreSQL database in a local volume. |
| 2 | PostgreSQL service is named database with a friendly container_name. |
| 3 | Image reference using the official PostgreSQL image. |
| 4 | Set the time zone and the postgres credentials for administrative tasks (for example, creating and changing database schemas for upgrades). |
| 5 | Mount the volume for persisting the PostgreSQL database files. |
| 6 | Run an internal health check to see if the PostgreSQL instance is ready. |
docker-compose up -ddocker-compose ps Name Command State Ports
--------------------------------------------------------------------------------
database docker-entrypoint.sh postgres Up (healthy) 0.0.0.0:5432->5432/tcpInstall the core instance
| For security reasons, Horizon is designed to run within an organization’s protected intranet. Do not expose the web console or sign in pages directly to the Internet without appropriate isolation controls (for example, a VPN with multi-factor authentication). |
sudo dnf -y install https://yum.opennms.org/repofiles/opennms-repo-stable-rhel9.noarch.rpm
sudo rpm --import https://yum.opennms.org/OPENNMS-GPG-KEYsudo dnf -y install opennmsIf you want time series trending and forecast functions, you must install the R project packages. The additional download size for packages is ~390MB.
sudo dnf -y install epel-release
sudo dnf -y install R-core| Disable the OpenNMS Horizon repository after installation to prevent unwanted upgrades when upgrading other packages on the server. After upgrading, Horizon requires manual steps to upgrade configuration files or migrate database schemas to a new version. We recommend that you exclude the Horizon packages from updates except when you plan to perform an upgrade. |
sudo dnf config-manager --disable opennms-repo-stable-*sudo dnf -y install tree
tree /opt/opennms -L 1/opt/opennms
├── bin
├── contrib
├── data
├── deploy
├── etc
├── jetty-webapps
├── lib
├── logs -> /var/log/opennms
├── share -> /var/opennms
└── systemsudo dnf -y install https://yum.opennms.org/repofiles/opennms-repo-stable-rhel8.noarch.rpm
sudo rpm --import https://yum.opennms.org/OPENNMS-GPG-KEYsudo dnf -y install opennmsIf you want time series trending and forecast functions you must install the R project packages. The additional download size for packages is ~390 MB.
sudo dnf -y install epel-release
sudo dnf -y install R-core| Disable the OpenNMS Horizon repository after installation to prevent unwanted upgrades when upgrading other packages on the server. After upgrade, Horizon requires manual steps to upgrade configuration files or migrate database schemas to a new version. We recommend that you exclude the Horizon packages from update except when you plan to perform an upgrade. |
sudo dnf config-manager --disable opennms-repo-stable-*sudo dnf -y install tree
tree /opt/opennms -L 1/opt/opennms
├── bin
├── contrib
├── data
├── deploy
├── etc
├── jetty-webapps
├── lib
├── logs -> /var/log/opennms
├── share -> /var/opennms
└── systemsudo yum -y install https://yum.opennms.org/repofiles/opennms-repo-stable-rhel7.noarch.rpm
sudo rpm --import https://yum.opennms.org/OPENNMS-GPG-KEYsudo yum -y install opennmsIf you want time series trending and forecast functions you must install the R project packages. The additional download size for packages is ~390 MB.
sudo yum -y install epel-release
sudo yum -y install R-core| Disable the OpenNMS Horizon repository after installation to prevent unwanted upgrades when upgrading other packages on the server. After upgrade, Horizon requires manual steps to upgrade configuration files or migrate database schemas to a new version. We recommend that you exclude the Horizon packages from update except when you plan to perform an upgrade. |
sudo yum -y install yum-utils
sudo yum-config-manager --disable opennms-repo-stable-*sudo yum -y install tree
tree /opt/opennms -L 1/opt/opennms
├── bin
├── contrib
├── data
├── deploy
├── etc
├── jetty-webapps
├── lib
├── logs -> /var/log/opennms
├── share -> /var/opennms
└── systemcurl -fsSL https://debian.opennms.org/OPENNMS-GPG-KEY | sudo gpg --dearmor -o /usr/share/keyrings/opennms.gpgecho "deb [signed-by=/usr/share/keyrings/opennms.gpg] https://debian.opennms.org stable main" | sudo tee /etc/apt/sources.list.d/opennms.list
sudo apt update| You can safely ignore the message about conflicting distributions (expected stable but got opennms-xx). |
sudo apt -y install opennmsIf you want time series trending and forecast functions you have to install the R project packages. The additional download size for packages is ~152 MB.
sudo apt -y install r-recommended| Disable the OpenNMS Horizon repository after installation to prevent unwanted upgrades when upgrading other packages on the server. After upgrade, Horizon requires manual steps to upgrade configuration files or migrate database schemas to a new version. We recommend that you exclude the Horizon packages from update except when you are planning on performing an upgrade. |
sudo apt-mark hold libopennms-java \
              libopennmsdeps-java \
              opennms-common \
opennms-dbsudo apt -y install tree
tree /usr/share/opennms -L 1/usr/share/opennms
├── bin
├── data
├── deploy
├── etc -> /etc/opennms
├── jetty-webapps
├── lib -> ../java/opennms
├── logs -> /var/log/opennms
├── share -> /var/lib/opennms
└── systemsudo apt -y install curl gnupg ca-certificates
curl -fsSL https://debian.opennms.org/OPENNMS-GPG-KEY | sudo gpg --dearmor -o /usr/share/keyrings/opennms.gpgecho "deb [signed-by=/usr/share/keyrings/opennms.gpg] https://debian.opennms.org stable main" | sudo tee /etc/apt/sources.list.d/opennms.list
sudo apt update| You can safely ignore the message about conflicting distributions (expected stable but got opennms-xx). |
sudo apt -y install opennmsIf you want time series trending and forecast functions you must install the R project packages. The additional download size for packages is ~134 MB.
sudo apt -y install r-recommended| Disable the OpenNMS Horizon repository after installation to prevent unwanted upgrades when upgrading other packages on the server. After upgrade, Horizon requires manual steps to upgrade configuration files or migrate database schemas to a new version. We recommend that you exclude the Horizon packages from update except when you plan perform an upgrade. |
sudo apt-mark hold libopennms-java \
              libopennmsdeps-java \
              opennms-common \
opennms-dbsudo apt -y install tree
tree /usr/share/opennms -L 1/usr/share/opennms
├── bin
├── data
├── deploy
├── etc -> /etc/opennms
├── jetty-webapps
├── lib -> ../java/opennms
├── logs -> /var/log/opennms
├── share -> /var/lib/opennms
└── systemdocker-compose.yml file.mkdir horizon
cd horizon
vi docker-compose.yml---
version: '3'
volumes:(1)
data-opennms: {}
data-config: {}
services:
horizon:(2)
image: opennms/horizon:31.0.9(3)
container_name: horizon
environment:
TZ: 'America/New_York'(4)
POSTGRES_HOST: 'my-database-host'(5)
POSTGRES_PORT: 5432
POSTGRES_USER: 'postgres'
POSTGRES_PASSWORD: 'my-postgres-password'
OPENNMS_DBNAME: 'opennms-core-db'
OPENNMS_DBUSER: 'opennms'
OPENNMS_DBPASS: 'my-opennms-db-password'
volumes:(6)
- data-opennms:/opennms-data
- data-config:/opt/opennms/etc
command: ["-s"]
ports:(7)
- '8980:8980/tcp'
- '8101:8101/tcp'
healthcheck:
test: [ 'CMD', 'curl', '-f', '-I', 'http://localhost:8980/opennms/login.jsp' ](8)
interval: 1m
timeout: 5s
retries: 3| 1 | Volume definitions to persist the Horizon Core data and configuration files. |
| 2 | The Horizon Core instance service is named horizon with a friendly container_name. |
| 3 | Image reference using the Horizon container image with the Core services. |
| 4 | Set the time zone and the postgres credentials to initialize the database that the Horizon Core instance uses. To list all available time zones, use timedatectl list-timezones. |
| 5 | Set the host or IP address of the host that runs the PostgreSQL database. |
| 6 | Mount directories to store RRD files, PDF reports, and configuration files in a persistent volume. |
| 7 | Publish ports to access the web UI and the Karaf shell. |
| 8 | Run an internal health check against the web UI to verify service health status. |
The process inside the container runs as a non-privileged user with user id 10001.
If you want the configuration files in a bind mount on your local host system, make sure you set permissions and ownership accordingly with chown 10001:10001 ./path/to/my/config-dir.
|
| To run a release candidate or a different version, use the public image tags from our repository on DockerHub. |
docker-compose config -qSet up the core instance
You can store your PostgreSQL credentials in the secure credentials vault.
To do this, use the scvcli command line utility to add the credentials, and reference these credentials in opennms-datasources.xml:
-
Create encrypted credentials for the PostgreSQL database connections:
sudo -u opennms ${OPENNMS_HOME}/bin/scvcli set postgres opennms password (1)
sudo -u opennms ${OPENNMS_HOME}/bin/scvcli set postgres-admin postgres password
1 Replace both passwordinstances with the actual passwords for youropennmsandpostgresdatabase accounts. -
Edit
opennms-datasources.xmlwithvi:sudo -u opennms vi /opt/opennms/etc/opennms-datasources.xml -
Set encrypted credentials to access the PostgreSQL database:
<jdbc-data-source name="opennms"
                    database-name="opennms" (1)
                    class-name="org.postgresql.Driver"
                    url="jdbc:postgresql://localhost:5432/opennms"
                    user-name="${scv:postgres:username}" (2)
                    password="${scv:postgres:password}" /> (3)

<jdbc-data-source name="opennms-admin"
                    database-name="template1"
                    class-name="org.postgresql.Driver"
                    url="jdbc:postgresql://localhost:5432/template1"
                    user-name="${scv:postgres-admin:username}" (4)
                    password="${scv:postgres-admin:password}" /> (5)
1 Set the database name that Horizon should use. 2 Set the user name to access the opennms database table. 3 Set the password to access the opennms database table. 4 Set the postgres user for administrative access to PostgreSQL. 5 Set the password for administrative access to PostgreSQL.
sudo /opt/opennms/bin/runjava -ssudo /opt/opennms/bin/install -disHorizon runs as a non-root user, which requires having a Linux kernel greater than 3.10.
If you run on an older kernel and you cannot upgrade your OS, you need to assign CAP_NET_RAW capabilities:
-
Run
systemctl edit opennms.serviceand add the following code to the[Service]section:AmbientCapabilities=CAP_NET_RAW CAP_NET_BIND_SERVICE
Reload the systemd unit with systemctl daemon-reload and restart the service with systemctl restart opennms.
(For more background on this issue, see H29+ won’t start with permission error to open ICMP socket on Discourse.)
sudo systemctl enable --now opennmssudo firewall-cmd --permanent --add-port=8980/tcp
sudo systemctl reload firewalldYou can store your PostgreSQL credentials in the secure credentials vault.
To do this, use the scvcli command line utility to add the credentials, and reference these credentials in opennms-datasources.xml:
-
Create encrypted credentials for the PostgreSQL database connections:
sudo -u opennms ${OPENNMS_HOME}/bin/scvcli set postgres opennms password (1)
sudo -u opennms ${OPENNMS_HOME}/bin/scvcli set postgres-admin postgres password
1 Replace both passwordinstances with the actual passwords for youropennmsandpostgresdatabase accounts. -
Edit
opennms-datasources.xmlwithvi:sudo -u opennms vi /usr/share/opennms/etc/opennms-datasources.xml -
Set encrypted credentials to access the PostgreSQL database:
<jdbc-data-source name="opennms"
                    database-name="opennms" (1)
                    class-name="org.postgresql.Driver"
                    url="jdbc:postgresql://localhost:5432/opennms"
                    user-name="${scv:postgres:username}" (2)
                    password="${scv:postgres:password}" /> (3)

<jdbc-data-source name="opennms-admin"
                    database-name="template1"
                    class-name="org.postgresql.Driver"
                    url="jdbc:postgresql://localhost:5432/template1"
                    user-name="${scv:postgres-admin:username}" (4)
                    password="${scv:postgres-admin:password}" /> (5)
1 Set the database name that Horizon should use. 2 Set the user name to access the opennms database table. 3 Set the password to access the opennms database table. 4 Set the postgres user for administrative access to PostgreSQL. 5 Set the password for administrative access to PostgreSQL.
sudo /usr/share/opennms/bin/runjava -ssudo /usr/share/opennms/bin/install -disThe core service user must be able to send ICMP echo requests.
During setup, the permissions for net.ipv4.ping_group_range are set permanently on boot via /etc/sysctl.d/99-opennms-non-root-icmp.conf.
Some system kernels do not honor this setting; in those cases, additional configuration is required to allow binding to privileged ports.
We recommend creating a systemd overlay to add the necessary settings to the service configuration:
-
Run
systemctl edit opennms.serviceand add the following line to the[Service]section:AmbientCapabilities=CAP_NET_RAW CAP_NET_BIND_SERVICE
Reload the systemd unit with systemctl daemon-reload and restart the service with systemctl restart opennms.
(For more background on this issue, see H29+ won’t start with permission error to open ICMP socket on Discourse.)
sudo systemctl enable --now opennmsIf you are using Uncomplicated Firewall (UFW) as your host firewall, you can allow access to the web user interface with the command:
sudo ufw allow 8980/tcpmkdir etc
chown 10001:10001 -R etcdocker-compose run horizon -idocker-compose up -d
You can also use this command when you run upgrades.
You must delete the file etc/configured file first.
It works as a guard to prevent unnecessary database migration runs on startup.
Show configuration changes from a pristine system with docker-compose exec -w /opt/opennms/bin horizon ./config-diff.sh -d.
If you changed your configuration files manually you can run the configuration tester with docker-compose exec horizon bin/config-tester -a
|
First-time sign in and data choices
After you start the Horizon core services, you can access the web application at http://core-instance-ip:8980/opennms.
The default user credentials are as follows:
* Username: admin
* Password: admin
After you sign in for the first time, you should immediately change the admin account’s password to a secure one.
|
The first time you log in, Horizon prompts for permission to allow the Data Choices module to collect and publish anonymous usage statistics to https://stats.opennms.org. The OpenNMS Group uses this anonymized information to help determine product use and to improve the Horizon software. We do not share it with third parties, and we will not use it for sales purposes.
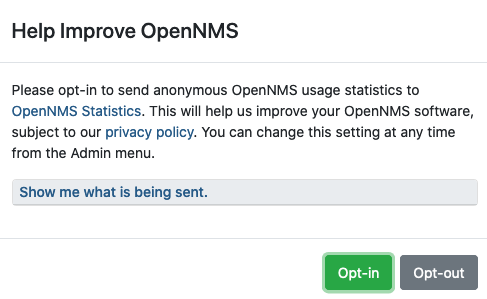
Click Show Me What is Being Sent to see what information we collect. Statistics collection and publication happen only if an admin user opts in.
| Admin users can enable or disable statistics collection at any time. |
To change your account’s password, follow these steps:
-
On the top menu bar, click .
-
Type your current password and new password in the appropriate fields.
-
Confirm your new password, and click Submit. The password is updated.
We encourage you to use Horizon with individual user accounts instead of the admin account.
If all users have individual accounts, you can see who is completing tasks like clearing or acknowledging alarms.
For information on how to create a personalized user account, see Create a new user in the Quick Start guide.
First monitored node
The default configuration will discover a single node with an interface 127.0.0.1 and detect services exposed on the loopback interface, including the OpenNMS-JVM service.
Nodes with this service have JMX-based data collection performed on Java JVM statistics such as heap memory and open file handles.
Next steps
See the Quick Start guide for more information on setting up and configuring your Horizon instance.